Sridhar Rajagopal : Multi-Octave Portable Capacitive Touch Piano
Multi-Octave Portable Capacitive Touch Piano
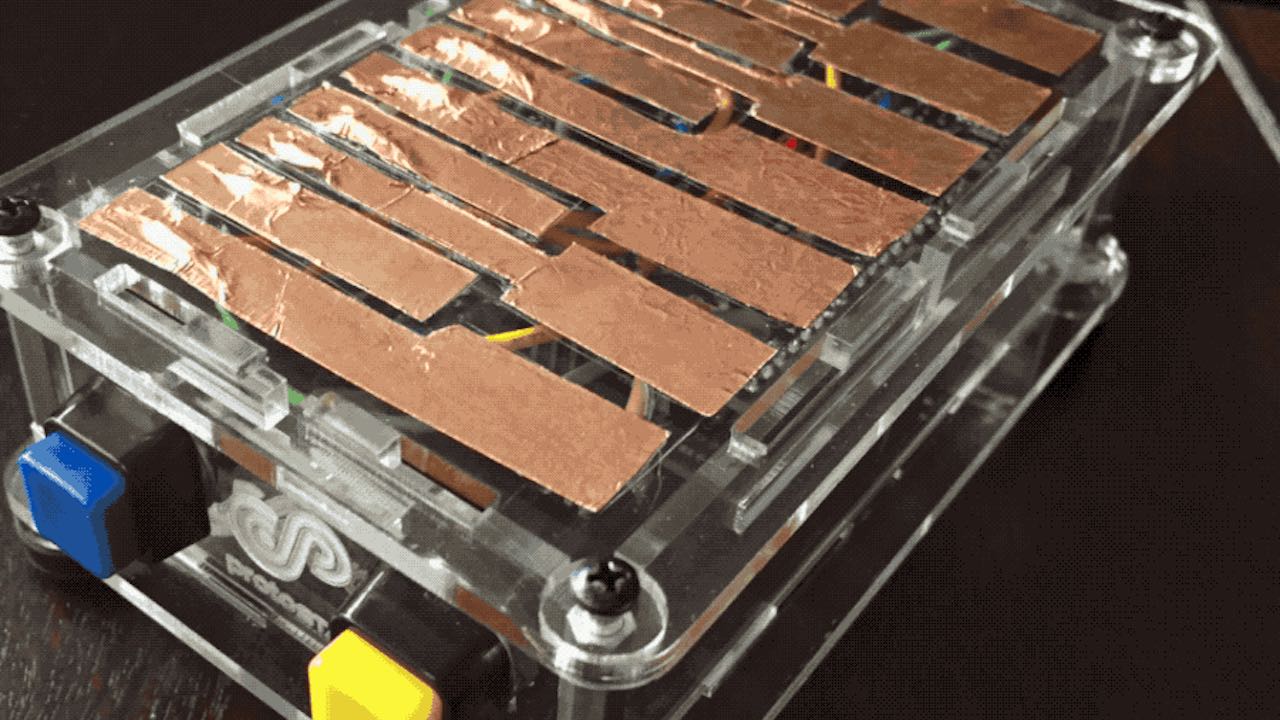
In my last project, I delved into how to build a Portable Capacitive Touch Piano using an Arduino, a Capacitive Touch Shield for Arduino using the MPR121, a piezo buzzer, and copper foil tape with conductive adhesive (cut in the shape of piano keys) enclosed in a clear acrylic ProtoStax for Arduino enclosure.
 In the section "Taking It Further!", I talked about the possibility of adding buttons to extend the range of the piano to increase/decrease the octave.
In this project, that's exactly what I do! I modified the ProtoStax for Arduino enclosure to add two cutouts for a couple of Panel-mounted push button switches. I wired the buttons to pins 2 and 3 on the shield (I could have used any other available pins, but using pins 2 and 3 allow for attaching interrupt routines to handle button events, if you so choose, without any hardware changes - and pins 2 and 3 were free and available!)
I also changed the firmware to respond to the button presses to increase/decrease the octave of the keys (yellow button to increase and blue button to decrease). There were two possibilities here -
1) using a yellow button press to decrease the octave, and a blue button press to increase the octave
2) Increase the octave when the yellow button is kept pressed (dropping it back to normal when released), and decrease the octave when the blue button is kept pressed (and bringing it back to normal when released).
#1 allows you to have a very large octave range - as much as a full-sized piano, and even more!
#2 gives you a 3-octave range - however, it just makes the playing so much more intuitive and easier. Keep the yellow button pressed for the higher octave or the blue pressed for the lower octave - this allows you to use both hands in conjunction to easily increase/drop the octave while you are playing.
I decided to go with option #2, but option #1 is very easy to implement in the firmware if you would like a full 7 octave range of a regular piano (or more!) and can remember and deal with the button presses and octaves while playing! If you are stuck on how to do that however, just message me below!
Here is the final outcome! (Refer to the Portable Capacitive Touch Piano post for more detailed delving into the code if you are just starting out)
Sridhar Rajagopal
: Entrepreneur. Software Engineer. Maker. Tinkerer. Internet-of-things addict.

Mountain View, CA
A seasoned tinkerer of bits and bytes, my first ever Maker Faire experience in 2012 really got me hooked on the Maker Movement and I started getting my hands dirty in all things making, with the playground of TechShop introducing me to all manner of tools which I wouldn't have had access to under normal circumstances.
I like to combine my love of software and hardware, and also try to weave in my love of music wherever possible. I've also created two iOS Apps for South Indian Classical Music called Talanome and My TalaVadyam.
I like to combine my love of software and hardware, and also try to weave in my love of music wherever possible. I've also created two iOS Apps for South Indian Classical Music called Talanome and My TalaVadyam.
Connect with Sridhar Rajagopal
How I can help you:
I am the creator of ProtoStax Enclosures - stackable, modular, extensible enclosures for Arduino, Raspberry Pi and other micro-controllers and single-board computers. We publish Tutorials to help newcomers with project ideas and coding challenges.
I've also created music apps for South Indian Classical Music - Talanome and My TalaVadyam.
I have experience in software and hardware and can help with any tips and pointers for your own project!
How you can help me:
Please check out my products - ProtoStax and iOS Apps - and follow us on FB, Twitter, Instagram, YouTube!
Please check out my products - ProtoStax and iOS Apps - and follow us on FB, Twitter, Instagram, YouTube!
Become a member to post comments or questions to this maker.
Here's a shareable link to this project: https://makermusicfestival.com/projectdirectory/multi-octave-portable-capacitive-touch-piano/
The information and media presented for this project was provided by its creator. The maker owns and has copyright on all materials submitted. The maker retains all intellectual property rights, including copyright, patents, and registered designs.